Django構築時にBootStrapのテンプレートでベースHTMLを使用して追加ページを作成する方法をまとめました。
Djangoでページを追加作成する場合は、「urls.py」と「view.py」を編集することでページを反映できます。
前回の記事はDjangoでBootStrapのテンプレートを使用し、反映させるまでの設定をしています。
以下のページを参考にしてください。

【Django】BootStrapテンプレートでベースHTMLを使いページを追加する方法
Djangoを構築し、BootStrapテンプレートを使用して、追加のページを作成する場合、ベースのHTMLファイルを利用してページを追加していきます。
今回のベーステンプレートは「simple-sidebar」を使用して、ページを量産していきます。
ベースのHTMLテンプレート、追加のHTMLページは「templates」フォルダ配下で作成していきます。
myhp
|-- __init__.py
|-- __pycache__
|-- admin.py
|-- apps.py
|-- migrations
|-- models.py
|-- tests.py
|-- urls.py
`-- views.py
mysite
templates/
|-- base1.html
|-- index.html
`-- test
    |-- app
    |   `-- app.html
    |-- base2.html
    |-- test1.html
    `-- test2.html
base.htmlとhtmlファイル(新規ページ)の作成方法
今回はベースとなるHTMLファイルはBootStrapのテンプレートを使用します。
「simple-sidebar」はindex.htmlがあるのでこのファイルをコピーして新たに「base.html」というファイルを作成します。
まずはベースのHTMLとなるファイルを以下のように編集します。
ハイライトをしている箇所を新規ページで利用する個所とします。
{%block (name)%}で囲っている箇所が編集できる箇所となります。
ベースのHTMLファイルを使用してを新規ページへ変更を加えたいかは自身で判断しましょう。
<!DOCTYPE html>
{% load static %}
<html lang="ja">

<head>

  <meta charset="utf-8">
  <meta name="viewport" content="width=device-width, initial-scale=1, shrink-to-fit=no">
  <meta name="description" content="">
  <meta name="author" content="">

  <title>{%block tab%}{%endblock%}</title>

------中略------

      <div class="container-fluid">
        <h1 class="mt-4">{% block main_title %}{%endblock%}</h1>
        {% block main_containts %}

        {%endblock%}
        <p>The starting state of the menu will appear collapsed on smaller screens, and will appear non-collapsed on larger screens. When toggled using the button below, the menu will change.</p>
        <p>Make sure to keep all page content within the <code>#page-content-wrapper</code>. The top navbar is optional, and just for demonstration. Just create an element with the <code>#menu-toggle</code> ID which will toggle the menu when clicked.</p>
      </div>
    </div>
    <!-- /#page-content-wrapper -->

------中略------
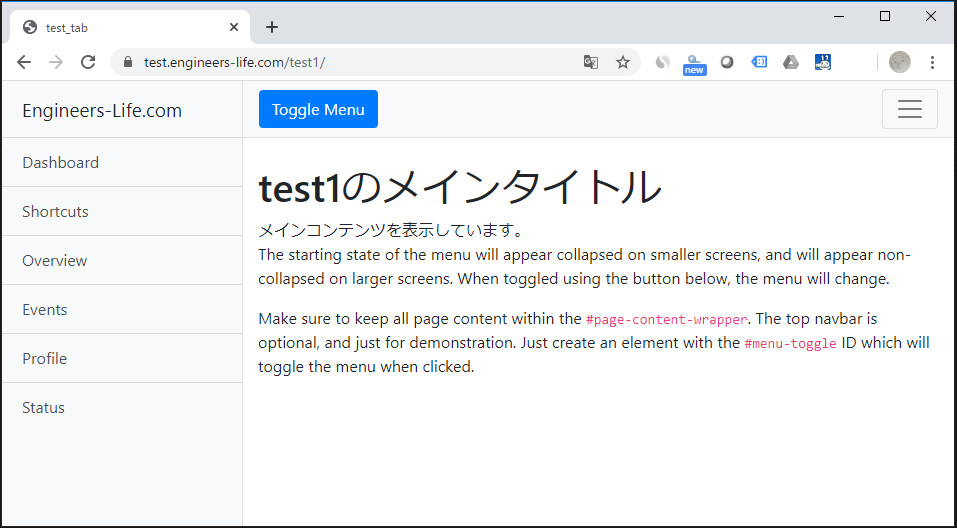
「test1」ページ
test1のページは「templates」直下にあるbase.htmlをベースとして作成しています。
$ cat templates/test/test1.html
{% extends 'base1.html'%}

{%block tab%}
test_tab
{%endblock%}


{%block title%}
Engineers-Life.com
{%endblock%}

{% block main_title %}
test1のメインタイトル
{%endblock%}

{% block main_containts %}
メインコンテンツを表示しています。
{%endblock%}
$
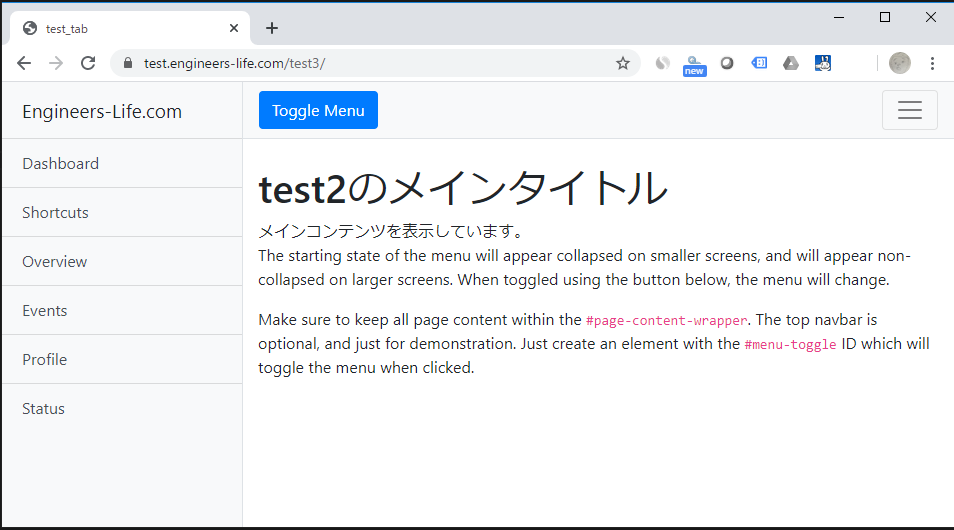
「test2」ページ
test2のページは「template/test」配下のbase.htmlをベースとして作成します。
$ cat templates/test/test2.html
{% extends 'test/base2.html'%}

{%block tab%}
test_tab
{%endblock%}


{%block title%}
Engineers-Life.com
{%endblock%}

{% block main_title %}
test2のメインタイトル
{%endblock%}

{% block main_containts %}
メインコンテンツを表示しています。
{%endblock%}
$
追加ページの構成
今回は「templates」配下、「test」フォルダ配下でそれぞれベースのHTMLテンプレートを作成し、追加のページを「test」フォルダ配下に設置しました。
htmlでパスを指定することでどこのフォルダに設定しても問題ありません。
$ tree templates/
templates/
|-- base1.html
|-- index.html
`-- test
    |-- app
    |   `-- app.html
    |-- base2.html
    |-- test.html
    |-- test1.html
    |-- test2.html
    `-- test3.html
上記でページは作成されますが、このままでは実際のURLのパスでページが表示されません。
以下で「urls.py」、「views.py」を追加編集することで設定が反映されます。
「urls.py」を編集
「urls.py」では、URLのパスを設定します。
以下のハイライトでパスは以下のように表示するようにします。
- 「test1」はhttp://x.x.x.x/test1
- 「test2」はhttp://x.x.x.x/test2
- 「app」はhttps://x.x.x.x/test/app
from django.urls import path
from . import views

app_name = 'myhp'
urlpatterns = [
    path('', views.index, name='index'),
    path('test1/', views.test1, name='test1'),
    path('test2/', views.test2, name='test2'),
    path('test3/', views.test3, name='test3'),
    path('test/app/', views.app, name='app'),
]
「views.py」を編集
次に「views.py」を編集します。
こちらはトップをtemplatesフォルダとし、その配下のHTMLファイルを指名しそれぞれ名前をリクエストするようにします。
from django.shortcuts import render

# Create your views here.

from django.http import HttpResponse
from django.template import Context, loader

def index(request):
    template = loader.get_template('index.html')
    context = {}
    return HttpResponse(template.render(context, request))

def test1(request):
    return render(request, 'test/test1.html')

def test2(request):
    return render(request, 'test/test2.html')

def test3(request):
    return render(request, 'test/test3.html')

def app(request):
    return render(request, 'test/app/app.html')
新規ページ作成確認
上記で作成した新規ページは以下のように表示されるようになります。
test1のページ
test2のページ
BootStrapを使用したページの新規作成は以上となります。
ITエンジニアの開発・検証・学習としてインターネット上で専用のサーバ(VPS)を利用しましょう!
実務経験はVPSで学べます。

コメント