Webサイトを無料でSSL化(https)する場合は「Let’s Encrypt」を使用します。
今回はNginxで作成したWebサイトへ「Let’s Encrypt」で取得したサーバー証明書を設定する手順をまとめます。
構築環境はConoHaVPS
![]() の環境で実施しています。
の環境で実施しています。
VPS環境は違っていても仮想マシンは同じですので、どのVPS環境でも同じ手順でのインストールは可能です。
無料SSL「Let’s Encrypt」を導入と設定手順(VPS環境)
まず事前準備として、以下が確認できることが必要となります。
- 該当のドメインが名前解決ができ、Webサイトが表示されること
- 80番ポートへのアクセスが可能なこと
次に以下でLet’s Encrypt のクライアントの「certbot」をインストールします。
インストール先の「/user/local」配下へ移動。
※ここでは任意のディレクトリであればどこでも問題ないです。
$ cd /usr/local
gitコマンドで「cerbot」をインストール
gitコマンドがない場合は、yumインストールで入れておくこと
$ git clone https://github.com/certbot/certbot
インストール後、certbotというディレクトリが作成されるので、ディレクトリ配下へ移動します。
$ cd certbot
以下のヘルプコマンドを実行し、ヘルプコマンドの一覧が表示されれば完了です。
$ ./certbot-auto --help
証明書の取得は「Nginx」を停止し、実行する
「cerbot-auto」コマンドで証明書を取得する際、Nginxが起動しているとエラーになり証明書が取得できません。
そのため、事前にNginxサービスは停止しておきます。
$ systemctl stop nginx
これは「Apache」も同様なので、Webサービスは事前に停止しておきます。
証明書の取得手順
証明書の取得はHTTPサーバーを立てることはないので「スタンドアローンモード」で実施します。
$ ./certbot-auto certonly --standalone -t
初回コマンド実行時は不足パッケージがインストールされます。
以下は、その後の手順となります。
$ ./certbot-auto certonly --standalone -t
Saving debug log to /var/log/letsencrypt/letsencrypt.log
Plugins selected: Authenticator standalone, Installer None
Enter email address (used for urgent renewal and security notices)
 (Enter 'c' to cancel): text@gmail.com

- - - - - - - - - - - - - - - - - - - - - - - - - - - - - - - - - - - - - - - -
Please read the Terms of Service at
https://letsencrypt.org/documents/LE-SA-v1.2-November-15-2017.pdf. You must
agree in order to register with the ACME server at
https://acme-v02.api.letsencrypt.org/directory
- - - - - - - - - - - - - - - - - - - - - - - - - - - - - - - - - - - - - - - -
(A)gree/(C)ancel: A

- - - - - - - - - - - - - - - - - - - - - - - - - - - - - - - - - - - - - - - -
Would you be willing to share your email address with the Electronic Frontier
Foundation, a founding partner of the Let's Encrypt project and the non-profit
organization that develops Certbot? We'd like to send you email about our work
encrypting the web, EFF news, campaigns, and ways to support digital freedom.
- - - - - - - - - - - - - - - - - - - - - - - - - - - - - - - - - - - - - - - -
(Y)es/(N)o: Y
Please enter in your domain name(s) (comma and/or space separated)  (Enter 'c'
to cancel): test.engineers-life.com
うまくいけば以下のように「Congratulations!」が表示されます。
IMPORTANT NOTES:
 - Congratulations! Your certificate and chain have been saved at:
   /etc/letsencrypt/live/engineers-life.com/fullchain.pem
   Your key file has been saved at:
   /etc/letsencrypt/live/engineers-life.com/privkey.pem
   Your cert will expire on 2020-08-04. To obtain a new or tweaked
   version of this certificate in the future, simply run certbot-auto
   again. To non-interactively renew *all* of your certificates, run
   "certbot-auto renew"
 - Your account credentials have been saved in your Certbot
   configuration directory at /etc/letsencrypt. You should make a
   secure backup of this folder now. This configuration directory will
   also contain certificates and private keys obtained by Certbot so
   making regular backups of this folder is ideal.
 - If you like Certbot, please consider supporting our work by:

   Donating to ISRG / Let's Encrypt:   https://letsencrypt.org/donate
   Donating to EFF:                    https://eff.org/donate-le

 - We were unable to subscribe you the EFF mailing list because your
   e-mail address appears to be invalid. You can try again later by
   visiting https://act.eff.org.
Nginxの設定
上記で成功後、certbotで取得した証明書は「/etc/letsencrypt/」配下に保存されます。
今回い、webサーバの設定で指定するのは「/etc/letsencrypt/live/該当ドメイン」以下にある証明書を利用します。
Nginxのファイルを設定します。
$ vim /etc/nginx/nginx.conf
nginx.confに以下の2行(5,6行目)を追加します。
    server {
        listen       443 ssl http2 default_server;

------中略ー-----
        ssl_certificate "/etc/letsencrypt/live/該当ドメイン/fullchain.pem";
        ssl_certificate_key "/etc/letsencrypt/live/該当ドメイン/privkey.pem";
------中略ー-----
        }
    }
- ssl_certificate:サーバ証明書と中間証明書が結合されている「fullchain.pem」のパスを指定
- ssl_certificate_key:証明書と対の秘密鍵であるprivkey.pemのパスを指定
上記設定が完了したら、Nginxを起動します。
$ systemctl start nginx
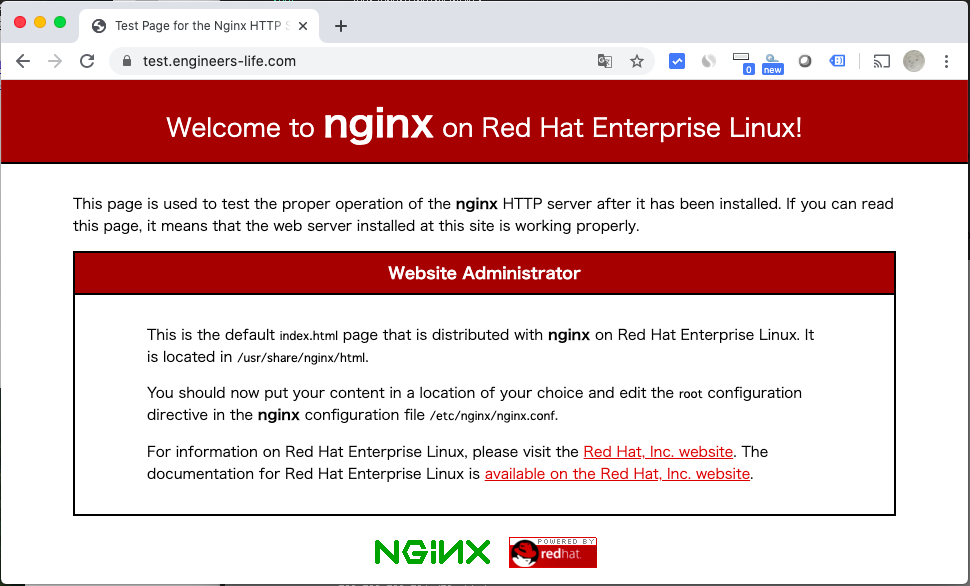
上手くいけば以下のようにhttpsでアクセスでき、証明書も有効になっていることが確認できます。
証明書の自動更新
「Let’s Encrypt」で取得できる証明書は有効期限が3ヶ月と短い期間となっています。
そのため、定期的に証明書を更新する必要があります。
証明書を更新するために「certbot-auto」コマンドには「renew」というサブコマンドがあります。
以下は、実行例です。
$ ./certbot-auto renew
Saving debug log to /var/log/letsencrypt/letsencrypt.log

- - - - - - - - - - - - - - - - - - - - - - - - - - - - - - - - - - - - - - - -
Processing /etc/letsencrypt/renewal/test.engineers-life.com.conf
- - - - - - - - - - - - - - - - - - - - - - - - - - - - - - - - - - - - - - - -
Cert not yet due for renewal

- - - - - - - - - - - - - - - - - - - - - - - - - - - - - - - - - - - - - - - -

The following certs are not due for renewal yet:
  /etc/letsencrypt/live/test.engineers-life.com/fullchain.pem expires on 2020-08-04 (skipped)
No renewals were attempted.
- - - - - - - - - - - - - - - - - - - - - - - - - - - - - - - - - - - - - - - -
上記のように「renew」コマンドが上手くいくと更新されます。
更新後は一度nginxも再起動しておきます。
$ /bin/systemctl reload nginx
毎回手動でコマンドを実行するのはめんどくさいので「crontab」で1ヶ月ごとに上記コマンドを実行するようにします。
私は、以下のよに設定を実施しました。
設定
$ crontab -e
0 5 1 * * /usr/local/certbot/certbot-auto renew && /bin/systemctl reload nginx
設定確認
$ crontab -l
0 5 1 * * /usr/local/certbot/certbot-auto renew && /bin/systemctl reload nginx
毎月1日AM5:00に証明書を更新するcronを実施するようにしました。
以上でNginxのSSL化の設定手順となります。
ITエンジニアの開発・検証・学習としてインターネット上で専用のサーバ(VPS)を利用しましょう!
実務経験はVPSで学べます。

コメント