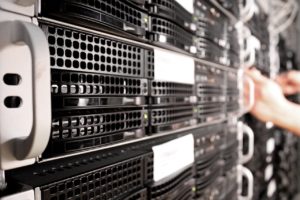
sambaはUNIXでSMBを使ったサービスを提供するためのソフトウェアでネットワークを通じてWindowsマシンにファイル共有やプリンタ共有などのサービスを提供することを可能にしています。
GPLというライセンス体系に基づいてフリーソフトウェアとして公開されています。
要は、NAS(共有フォルダ)みたいなんものです。
また、SMBとはネットワーク上の複数のWindowsコンピュータ間でファイル共有やプリンタ共有などを行うためのプロトコルであり、通信サービスのことです。
sambaインストール
まずは、sambaをyumコマンドでインストールします。
$ yum -y install samba
sambaサーバアクセス用ユーザー作成
インストールが正常に完了したら、sambaの設定を行います。
$ useradd samba
$ passwd samba

ユーザー samba のパスワードを変更。

新しいパスワード:samba123
よくないパスワード: 辞書の単語に基づいています
新しいパスワードを再入力してください:samba123
passwd: 全ての認証トークンが正しく更新できました。
“samba”をsambaアクセスユーザにする
新しく作成したユーザー”samba”をsambaのアクセスユーザにします。
$ pdbedit -a samba
new password:
retype new password:
Unix username: samba
NT username:
Account Flags: [U ]
User SID: S-1-5-21-855047447-377638603-833836796-1000
Primary Group SID: S-1-5-21-855047447-377638603-833836796-513
Full Name:
Home Directory: \rancidsamba
HomeDir Drive:
Logon Script:
Profile Path: \rancidsambaprofile
Domain: RANCID
Account desc:
Workstations:
Munged dial:
Logon time: 0
Logoff time: 木, 07 2月 2036 00:06:39 JST
Kickoff time: 木, 07 2月 2036 00:06:39 JST
Password last set: 火, 31 3月 2015 00:46:25 JST
Password can change: 火, 31 3月 2015 00:46:25 JST
Password must change: never
Last bad password : 0
Bad password count : 0
Logon hours : FFFFFFFFFFFFFFFFFFFFFFFFFFFFFFFFFFFFFFFFFF
そのほかのユーザーおよびディレクトリ作成、変更例
sambaアクセスユーザのパスワード変更
$ smbpasswd linux
sambaアクセスユーザの削除
$ pdbedit -x linux
ホームディレクトリ作成
sambaで使用する共有フォルダを作成します。
$ mkdir /etc/skel/samba
アクセス権を変更する
$ chmod 755 /etc/skel/samba
※共有ディレクトリ作成
$ mkdir /home/samba ←すでにある場合はOK
アクセス権を変更する
$ chown nobody:nobody samba/ ←共有ディレクトリ所有者変更
samba設定
 vim /etc/samba/smb.conf


#======================= Global Settings =====================================

[global]
unix charset = UTF-8
dos charset = CP932


#ファイル作成時のパーミッション
create mask = 0644
force create mode = 0
security mask = 0644
force security mode = 0

#ディレクトリ作成時のパーミッション
directory mask = 0755
force directory mode = 0
directory security mask = 0755
force directory security mode = 0

#ファイル・ディレクトリ作成時の所有者を「root」にする
force user = root


# ----------------------- Standalone Server Options ------------------------
#
# Scurity can be set to user, share(deprecated) or server(deprecated)
#
# Backend to store user information in. New installations should
"smb.conf" 340L, 10762C                                                                                         103,2-9       28%
#
# Interfaces lets you configure Samba to use multiple interfaces
# If you have multiple network interfaces then you can list the ones
# you want to listen on (never omit localhost)
#
# Hosts Allow/Hosts Deny lets you restrict who can connect, and you can
# specifiy it as a per share option as well
#
        #workgroup = MYGROUP
        workgroup = WORKGROUP
        server string = Samba Server Version %v

;       netbios name = MYSERVER

;       interfaces = lo eth0 192.168.12.2/24 192.168.13.2/24
;       hosts allow = 127. 192.168.12. 192.168.13.
        hosts allow = 10.0.0. 127.


# --------------------------- Printing Options -----------------------------
#
# Load Printers let you load automatically the list of printers rather
# than setting them up individually
#
# Cups Options let you pass the cups libs custom options, setting it to raw
# for example will let you use drivers on your Windows clients
#
# Printcap Name let you specify an alternative printcap file
#
# You can choose a non default printing system using the Printing option

;       load printers = yes
        load printers = no #追加(プリンタ共有無効化)※Sambaでプリンタを共有しない場合
        cups options = raw


以下を最終行へ追加
[public]
   comment = Public Stuff
   path = /home/samba
   public = yes
   writable = yes
samba起動
上記、設定が完了したら実際にsambaを起動します。
$ /etc/rc.d/init.d/smb start
SMB サービスを起動中: [ OK ]
$ /etc/rc.d/init.d/nmb start
NMB サービスを起動中: [ OK ]
chkconfigの設定をしておきます。
# chkconfig smb on
# chkconfig nmb on
sambaにアクセスできない場合
sambaにアクセスできない場合はとりあえず”iptables”を止めて確認しましょう。
※アクセスできない場合はiptablesでフィルターがかかっている可能性あります。
$ service iptables stop
iptables: チェインをポリシー ACCEPT へ設定中filter [ OK ]
iptables: ファイアウォールルールを消去中: [ OK ]
iptables: モジュールを取り外し中: [ OK ]
iptablesを停止し続けるのはおすすめができないので原因がわかればiptablesは起動しておきます。
また、sambaにアクセスできても権限がないとはじかれる場合は権限を付与します。
chmod 766 samba/
共有ファイル(samba)へアクセス
ファイル名を指定して実行→「\sambaのサーバアドレス、もしくはホスト名」
or
フォルダから「\sambaのサーバアドレス、もしくはホスト名」
ID:samba用に設定したID
Pass:samba用に設定したPass
アクセス確認でき、フォルダ、ファイルの作成、保存、削除ができればOKです。
CentOS7のsambaインストール手順はこちらから!

以上です。

ITエンジニアの開発・検証・学習としてインターネット上で専用のサーバ(VPS)を利用しましょう!
実務経験はVPSで学べます。
コメント