資料の管理場所や資料を一つのツールに一元管理したかったのでGrowiをDockerコンテナで構築しました。
今回はGrowiのDockerコンテナ設計手順をまとめます。
GrowiはWikiをベースとしたコミュニケーションツールで、MarkDown形式で書けるソフトウェアです。
さらにMarkDownのリアルタイムプレビューや投稿ユーザの設定もできる機能があります。
公式のサイトは以下となります。
https://github.com/weseek/growi-docker-compose
「Growi」をDockerコンテナで構築とSSL対応設計
CentOSで「Growi」を構築するにあたり、事前に以下のインストールが必要となります。
- Docker
- Python3
- docker-compose(pip install)
- git(yum install)
CentOSでDockerインストール方法
https://genchan.net/it/virtualization/docker/7955/
CentOSでpythonインストール方法
https://genchan.net/it/programming/python/12436/
それでは以下で「Growi」の構築手順を説明します。
Githubから「Growi」をダウンロード
gitコマンドでgrowiの設計ファイルをダウンロードします。
※任意のディレクトりでダウンロード
$ git clone https://github.com/weseek/growi-docker-compose.git growi
ダウンロードされると以下のようにgrowiフォルダが表示されます。
フォルダ内にはGrowiコンテナを構築するためのファイルが保存されています。
$ ll
total 4
drwxr-xr-x 6 root root 4096 May 12 13:34 growi
$
$ cd growi
$ ll
total 32
-rw-r--r-- 1 root root  946 May 12 13:34 Dockerfile
-rw-r--r-- 1 root root 1069 May 12 13:34 LICENSE
-rw-r--r-- 1 root root 3557 May 12 13:34 README.md
-rw-r--r-- 1 root root 1150 May 12 13:34 docker-compose.dev.yml
-rw-r--r-- 1 root root 2212 May 12 13:34 docker-compose.yml
drwxr-xr-x 3 root root 4096 May 12 13:34 elasticsearch
drwxr-xr-x 6 root root 4096 May 12 13:34 examples
drwxr-xr-x 2 root root 4096 May 12 13:34 hackmd
Growiの「docker-compose」を編集
公式でも書かれている通り、「ports」の設定を10行目で変更しています。
今回構築したサーバーはメモリを4GBとっているので、55行目で2GBに変更しています。
メモリは多めにとっておいた方が、検索時に動作が良いとか書いていたので変更してます。
また、ファイルアップロードはサーバーのローカルストレージを使用するので、22行目でアクティブ化します
version: '3'

services:
  app:
    build:
      context: .
      dockerfile: ./Dockerfile
    ports:
      #- 127.0.0.1:3000:3000    # localhost only by default
      - 3000:3000
    links:
      - mongo:mongo
      - elasticsearch:elasticsearch
    depends_on:
      - mongo
      - elasticsearch
    environment:
      - MONGO_URI=mongodb://mongo:27017/growi
      - ELASTICSEARCH_URI=http://elasticsearch:9200/growi
      - PASSWORD_SEED=changeme
      # - FILE_UPLOAD=mongodb   # activate this line if you use MongoDB GridFS rather than AWS
      - FILE_UPLOAD=local     # activate this line if you use local storage of server rather than AWS
      # - MATHJAX=1             # activate this line if you want to use MathJax
      # - PLANTUML_URI=http://  # activate this line and specify if you use your own PlantUML server rather than public plantuml.com
      # - HACKMD_URI=http://    # activate this line and specify HackMD server URI which can be accessed from GROWI client browsers
      # - HACKMD_URI_FOR_SERVER=http://hackmd:3000  # activate this line and specify HackMD server URI which can be accessed from this server container
      # - FORCE_WIKI_MODE='public'    # activate this line to force wiki public mode
      # - FORCE_WIKI_MODE='private'   # activate this line to force wiki private mode

    command: "dockerize
              -wait tcp://mongo:27017
              -wait tcp://elasticsearch:9200
              -timeout 60s
              npm run server:prod"
    restart: unless-stopped
    volumes:
      - growi_data:/data

  mongo:
    image: mongo:3.6
    restart: unless-stopped
    volumes:
      - mongo_configdb:/data/configdb
      - mongo_db:/data/db

  elasticsearch:
    build:
      context: ./elasticsearch
      dockerfile: ./Dockerfile
    environment:
      - bootstrap.memory_lock=true
      #- "ES_JAVA_OPTS=-Xms256m -Xmx256m"  # increase amount if you have enough memory
      - "ES_JAVA_OPTS=-Xms2g -Xmx2g"  # increase amount if you have enough memory
    ulimits:
      memlock:
        soft: -1
        hard: -1
    restart: unless-stopped
    volumes:
      - es_data:/usr/share/elasticsearch/data
      - ./elasticsearch/config/elasticsearch.yml:/usr/share/elasticsearch/config/elasticsearch.yml

volumes:
  growi_data:
  mongo_configdb:
  mongo_db:
  es_data:
Docker起動前にfirewall開放
Growiではポート番号(3000)を使用するので、起動前に対象のポートを開放します。
firewall-cmd --add-port=3000/tcp --zone=public --permanent
firewall-cmd --reload
以下でポートの開放ができていることが確認できます。
$ firewall-cmd --list-all
public (active)
  target: default
  icmp-block-inversion: no
  interfaces: eth0
  sources:
  services: cockpit dhcpv6-client http https ssh
  ports: 3000/tcp
  protocols:
  masquerade: yes
  forward-ports:
  source-ports:
  icmp-blocks:
  rich rules:

$
「CentOS8」におけるDocker環境「NAPT」の許可を実施
CentOS8のDocker環境ではFirewallで設定しないとコンテナ間での通信ができずエラーとなってしまします。
そのため以下にてNAPTの許可を実施します。
# firewall-cmd --add-masquerade --permanent
# firewall-cmd --reload
Growiを「docker-compose」コマンドで起動
上記設定後、Growiコンテナを起動します。
$ docker-compose up -d
起動後、ブラウザを開いて対象のアドレスにアクセスします。
https://ipアドレス:3000
起動後少し時間はかかりますが、以下のページが表示され、管理ユーザーを作成します。
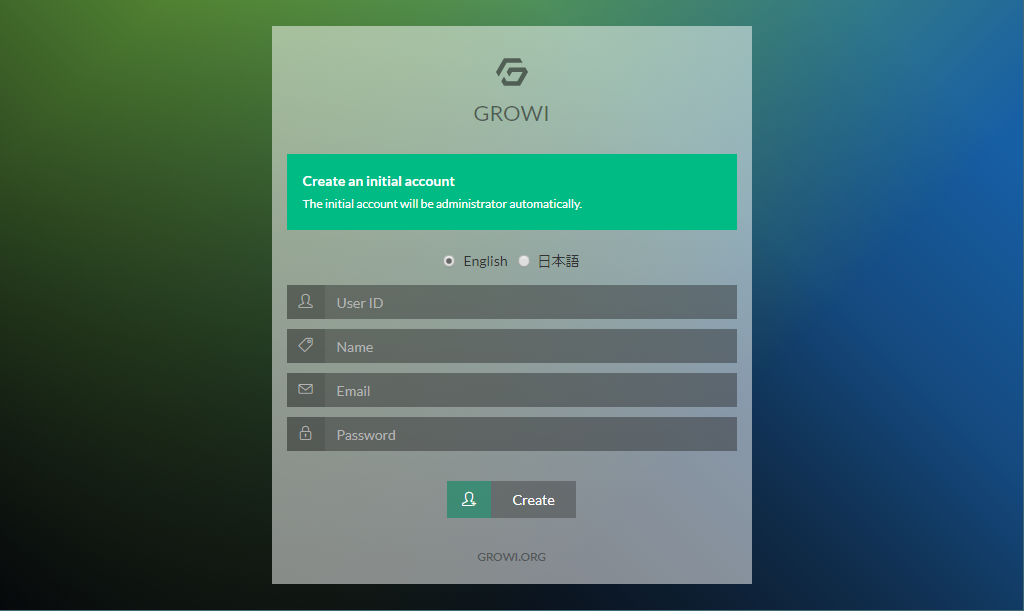
管理ユーザー作成後、Growiが使用できるようになります。
SSL(https)対応(無料)
以下ではSSL対応の手順となりますが、事前にグローバル環境でドメインで名前解決ができることが前提となります。
SSL対応は「https-portal」を使用します。
docker-compose.ymlへの追加設定は以下となります。
  https-portal:
    image: steveltn/https-portal:1
    ports:
            - 80:80
            - 443:443
    links:
            - web
    restart: always
    environment:
      DOMAINS: 'example.com -> http://app:3000'
      STAGE: 'staging' # Don't use production until staging works
      #FORCE_RENEW: 'true'
    container_name: https-portal
    volumes:
            - ./ssl_certs:/var/lib/https-portal

volumes:
    ssl_certs:
「docker-compose.yml」の設定例
SSL対応時のdocker-composeの設定例は以下となります。
version: '3'

services:
  app:
    build:
      context: .
      dockerfile: ./Dockerfile
    ports:
      #- 127.0.0.1:3000:3000    # localhost only by default
      - 3000:3000
    links:
      - mongo:mongo
      - elasticsearch:elasticsearch
    depends_on:
      - mongo
      - elasticsearch
    environment:
      - MONGO_URI=mongodb://mongo:27017/growi
      - ELASTICSEARCH_URI=http://elasticsearch:9200/growi
      - PASSWORD_SEED=changeme
      # - FILE_UPLOAD=mongodb   # activate this line if you use MongoDB GridFS rather than AWS
      - FILE_UPLOAD=local     # activate this line if you use local storage of server rather than AWS
      # - MATHJAX=1             # activate this line if you want to use MathJax
      # - PLANTUML_URI=http://  # activate this line and specify if you use your own PlantUML server rather than public plantuml.com
      # - HACKMD_URI=http://    # activate this line and specify HackMD server URI which can be accessed from GROWI client browsers
      # - HACKMD_URI_FOR_SERVER=http://hackmd:3000  # activate this line and specify HackMD server URI which can be accessed from this server container
      # - FORCE_WIKI_MODE='public'    # activate this line to force wiki public mode
      # - FORCE_WIKI_MODE='private'   # activate this line to force wiki private mode

    command: "dockerize
              -wait tcp://mongo:27017
              -wait tcp://elasticsearch:9200
              -timeout 60s
              npm run server:prod"
    restart: unless-stopped
    volumes:
      - growi_data:/data

  mongo:
    image: mongo:3.6
    restart: unless-stopped
    volumes:
      - mongo_configdb:/data/configdb
      - mongo_db:/data/db

  elasticsearch:
    build:
      context: ./elasticsearch
      dockerfile: ./Dockerfile
    environment:
      - bootstrap.memory_lock=true
      #- "ES_JAVA_OPTS=-Xms256m -Xmx256m"  # increase amount if you have enough memory
      - "ES_JAVA_OPTS=-Xms2g -Xmx2g"  # increase amount if you have enough memory
    ulimits:
      memlock:
        soft: -1
        hard: -1
    restart: unless-stopped
    volumes:
      - es_data:/usr/share/elasticsearch/data
      - ./elasticsearch/config/elasticsearch.yml:/usr/share/elasticsearch/config/elasticsearch.yml

  https-portal:
    image: steveltn/https-portal:1
    ports:
            - 80:80
            - 443:443
    links:
            - web
    restart: always
    environment:
      DOMAINS: 'test.engineers-life.com -> http://app:3000'
      STAGE: 'staging' # Don't use production until staging works
      #FORCE_RENEW: 'true'
    container_name: https-portal
    volumes:
            - ./ssl_certs:/var/lib/https-portal
volumes:
  growi_data:
  mongo_configdb:
  mongo_db:
  es_data:
  ssl_certs:
以上でGrowiのDockerコンテナ構築+SSL対応設計となります。
ITエンジニアの開発・検証・学習としてインターネット上で専用のサーバ(VPS)を利用しましょう!
実務経験はVPSで学べます。

コメント